Butter Three Ways
Use the same unsalted butter to finish a sauce, brown a batch for vegetables, and soften a few spoonfuls into a spread.
8 min read
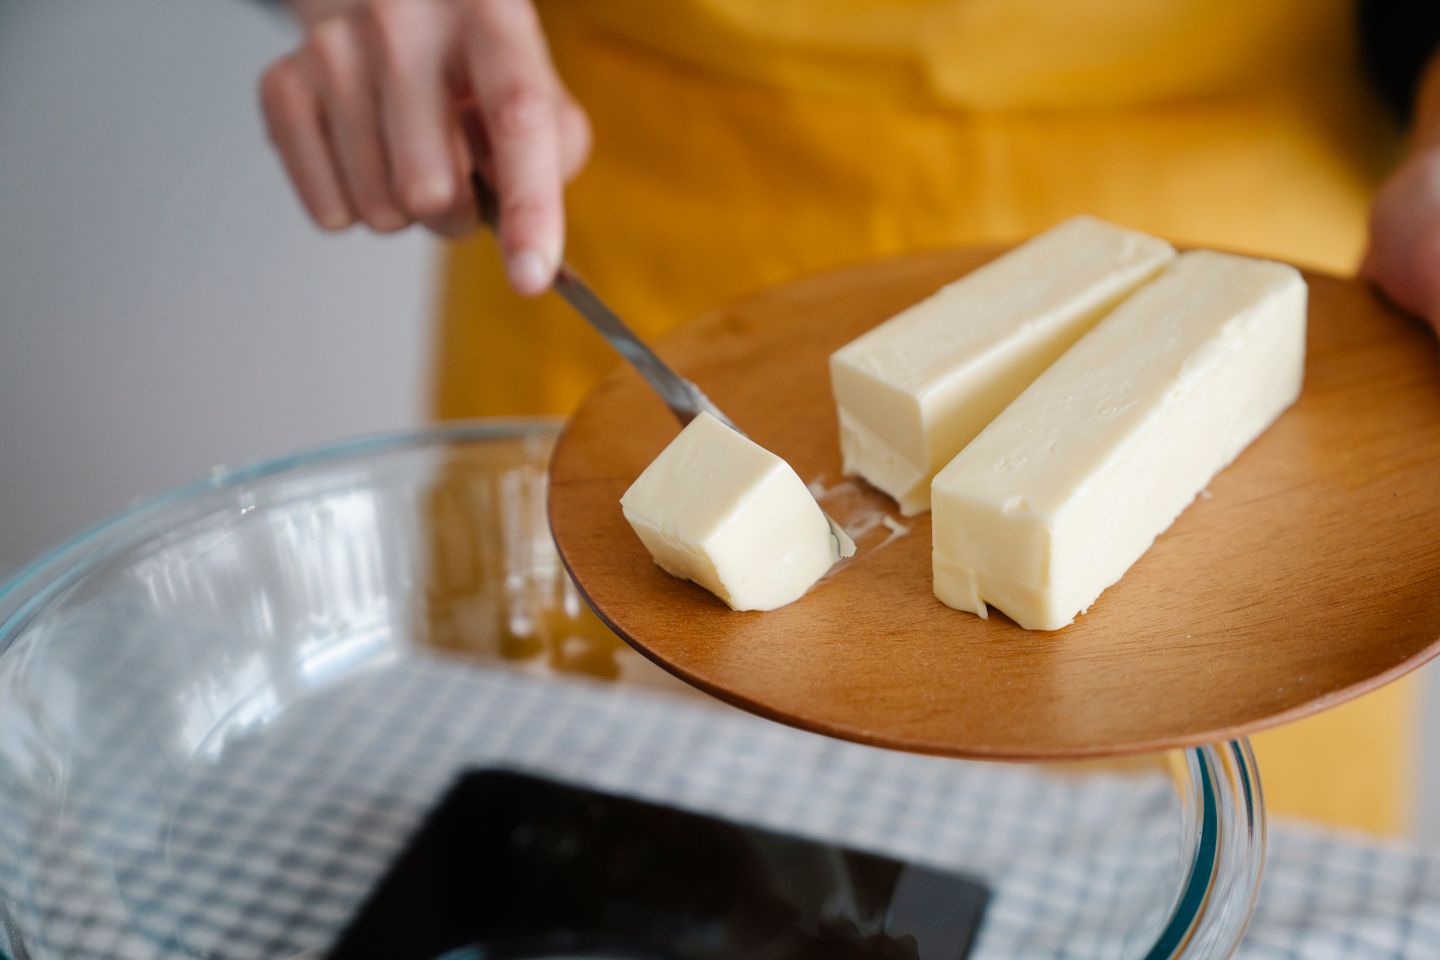
A stick of unsalted butter can leave three very different trails on a plate. A cold piece whisked into a sauce gives it a gloss. A browned spoonful can leave little toasted specks among the ridges of a roasted vegetable. Softened butter takes on the shape of a knife and spreads easily over a slice of bread. Those results depend on the state of the butter when it meets the rest of the food. Starting with three pieces cut from the same package makes it easy to see the differences.
The distinction matters most at the end of cooking. A pan of vegetables can take browned butter straight from a small saucepan. A nearly finished sauce needs heat gentle enough to keep its gloss once the cold pieces go in. A piece of toast is ready for soft butter as soon as the steam has cleared enough to see the crumb. None of these uses takes much butter. A couple of tablespoons for each is plenty when you are making dinner for two or three.
Pick the butter and divide it while cold
Unsalted butter is useful here because you can decide later where salt will do the most good. A piece destined to be browned may go on already salted vegetables. The piece you stir into a reduced pan sauce may land in a much saltier mixture than you expected. A spread can take a pinch of flaky salt on the surface of the toast, where it stays crunchy. If the butter you have is salted, use it and leave the rest of the salt until you can taste the completed dish.
Cut three pieces of 25 to 30 grams, about two tablespoons apiece. Keep the sauce portion in the refrigerator, ready to cut into smaller pieces. Set the spread portion on a clean plate to soften. The one for browning can go into a small saucepan whenever you have an uninterrupted five minutes to watch it. Keeping the portions separate saves you from having to cut a warm block when you are already at the stove.
Use butter that smells fresh when you unwrap it. Paper that has been open in the refrigerator can pick up the smell of chopped onion or strong cheese. If you only need a little at a time, wrap the rest snugly and keep it in a covered compartment or container. A flavored spread makes the taste of the butter especially obvious, while a dark brown batch can mask some of it. Both dishes are easier to season when the starting flavor is clean.
Whisk cold pieces into a small sauce
Start with about 80 milliliters, or a third of a cup, of unsalted stock in a small skillet. A spoonful of pan juices from cooked vegetables is useful if you have some. Add a teaspoon of lemon juice or mild vinegar and let the liquid bubble until it has reduced by about half. Draw a spoon across the bottom of the pan to see how quickly the liquid flows back. A thick layer of liquid can make the finished sauce taste thin. A nearly dry pan can leave too little water to hold the butter in suspension.
Take the pan off the heat and wait for the strongest bubbling to stop. Cut your cold butter into four or five small pieces. Whisk in one or two at a time, letting the edges melt before adding the next. The liquid will become a little paler. Tilt the pan if the whisk cannot reach a shallow puddle. If the last piece is reluctant to melt, put the pan back over low heat for a moment while moving the whisk. Stop when the surface looks even and a spoon dipped into the sauce comes out with a faint, continuous coat.
Season at the end and spoon the sauce over warm food right away. An early taste of the stock tells you how strong it was to begin with, but only a taste after the butter goes in tells you how much sharpness you want. Green beans can take a brighter sauce than delicate peas. A spoon of sauce over both vegetables can help you decide whether to add the last few drops of lemon to the pan or serve wedges at the table.
If you see a clear oily ring at the edge, the mixture may have overheated. Put a teaspoon of cool water in a clean bowl and whisk in a little of the split sauce. Add more gradually if the first spoonful goes smooth. The repaired batch can work perfectly well at the table, but serve it soon after whisking. For a second try, reduce the stock first and move the pan to a cool burner before the butter comes out of the refrigerator.
Brown the milk solids where you can see them
A light-colored saucepan makes this much easier because you can see the particles at the bottom. Put the portion of butter over medium heat and let it melt. It will foam and make a steady noise as water turns to steam. Swirl the pan gently. Use a spatula to draw a short line through the foam if you cannot see the bottom. The first flecks you see will be pale. As they turn tan and the sound quiets, the butter can darken surprisingly fast.
Take it off the heat when the flecks are amber and the pan smells a little like toast or hazelnuts. Pour the butter into a heat-safe bowl straight away, scraping in the browned bits. The residual heat of the pan can turn a good brown into black while you reach for a spoon. If you want a light, mellow flavor, stop as soon as a few flecks have reached a clear golden brown. For a deeper aroma, allow a little more color while staying close enough to see each change.
Try it over a tray of roasted cauliflower or thick slabs of squash. Give the tray a quick toss so the dark flecks spread across the vegetables instead of collecting in one corner. A few drops of lemon can help if the vegetable is particularly sweet. For a bowl of plain noodles, add a teaspoon at a time and stir. Browned butter carries flavor effectively enough that a small amount can season the whole bowl. If you are using it in a baking recipe, choose one written for browned butter, since evaporation has changed its water content.
If you plan to make more than a couple of tablespoons, begin with a pan broad enough to hold the melted butter in a shallow layer. A big batch will spend longer foaming before it colors. Put the bowl you will pour it into on a heatproof mat beside the stove before starting. A dry metal spoon helps scrape the browned flecks free. They are easy to leave behind and contain much of the toasted flavor.
Soften the last portion for a spread
Press the butter with the back of a teaspoon. It should smear with little effort but still hold a ridge. If the edges have softened before the center, cut the piece in half and give it a few more minutes. Once it is pliable, mash in a scant teaspoon of finely chopped herbs, a few turns of black pepper, and a small pinch of finely grated lemon zest. Add the zest in stages. A little can be enough if the butter will go on mild bread.
Spread the softened butter across a slice with an uneven crumb. A slightly warm slice draws some of it into the holes while leaving the rest visible. A hot slice can melt it immediately, which is welcome if you want the flavor to reach the middle. For a sandwich, let the bread cool first so the spread remains in a thin layer under the fillings. The same herb butter can finish steamed vegetables if it is added just before serving.
For a sweeter version, leave the herbs out and mash in a little honey or maple syrup. Add it gradually so the spread stays cohesive. Salt the bread after spreading if you want a few larger grains to show up in a bite. Refrigerate unused homemade flavored butter promptly, keep it covered, and use it within a few days or freeze it for later. When you need a portion for toast, slice off what you want and let only that piece soften.
Keep a place for each texture
If all three portions are ready at once, take some plain cooked potato or good bread and divide it among three small plates. Put a few drops of the whisked sauce on one, browned butter on another, and a thin smear of softened butter on the third. Eat the plate with the sauce first. Its texture is most distinct when warm. The browned portion may leave a stronger aroma after you swallow. The spread offers small pockets of whatever you stirred into it.
Once you know what each one does, the next choice can be made by looking at dinner. A rough pile of warm grains takes well to a few toasted flecks. Brothy vegetables that already have moisture may need only a final gloss. A sandwich needs something that stays under the fillings. Buy the butter you like and cut off a little at a time. The rest of the decision can wait until the pan or the toast is in front of you.